Stage 4 - With four gruntz, you can take on the world!
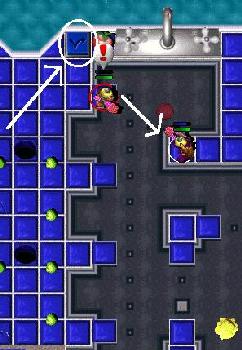
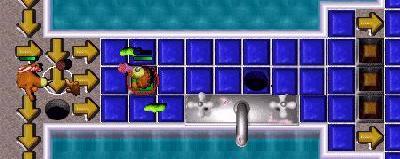
Step onto the upper arrows, get the megaphone and you'll get a rock. Kill the enemy rock grunt with it. When he throws at you just step aside. Enter the blue warp and cross the moving bridge to the next blue warp. Don't fight the toyer grunt, but just run for the black one switch and get out off there.
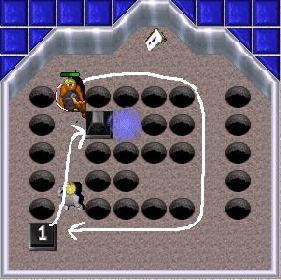
Lure the toyer grunt towards you and start running away, cut the corners! Hit the black one switch and enter the blue warp.
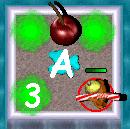
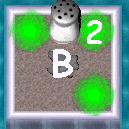
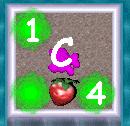
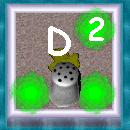
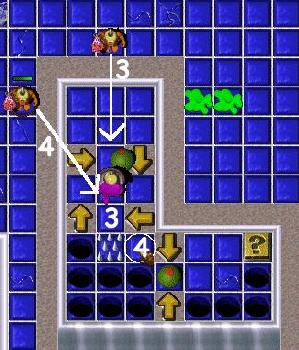
Suck up the puddlez, follow the sequence A3 - D2 - C1 - B2 - C4 and enter the blue warp.
Kill the barehanded grunt, suck up the puddle and hit the green toggle switch. Now hit the lower right orange switch, step on the green toggle switch after the outlets and take the zap cola. Walk back and suck up the puddle near the checkpoint and hit the upper left orange switch. Give the jack-in-the-box to the enemy sword grunt, hit the green toggle switch and walk back. Now hit the lower left orange switch and suck up the puddle below. Pick up the megaphone and suck up the puddle on the island. Walk back and proceed towards the checkpoint. Walk at the side of the arrows. Just before the ball hits you step on an arrow. Hit the checkpoint and enter the blue warp.
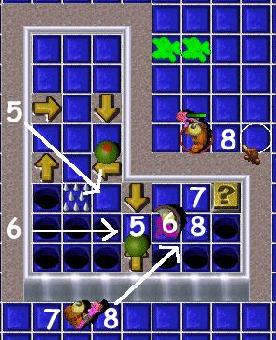
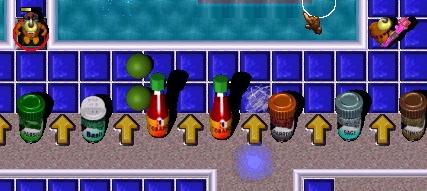
Get the pogo stick from your resourcez, cross the bridges and give the toy to the enemy shovel grunt. Cross the bridge and suck up the four puddlez. Put the four new gruntz on the creation pads. They all hit their black one switch. The straw grunt proceeds now and enters the checkpoint where he's stuck. One of your gruntz goes downstairs, crosses the area, goes upstairs, ignores the enemy sponge gruntz and gets the spinning wheel. Hit the timer switch and run across the same area. Go upstairs, hit the black one switch and pick up the sponge gun. All gruntz proceed to the next area. The sponge grunt, picks up a megaphone, goes downstairs and passes the slime at the right hand side. He picks up another megaphone, walks to the end, kills the enemy sponge grunt and hits the blue toggle switch.
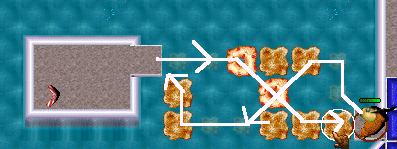
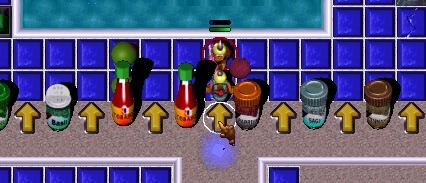
Shoot the enemy sponge grunt onto the frying-plate and hit the blue toggle switch.
Both the shield grunt and the club grunt attack the six enemy gruntz one by one. After killing all the enemies take the zap cola. The shield grunt walks down, picks up a megaphone and gets the timebomb tool from the resourcez. Blow up the three lumps and pick up another megaphone. Give the shovel to the club grunt. Walk back and blow up the five lumps and you'll get some more zap cola. Walk back and blow up all the lumps. Again there's some zap cola, but also a coin. The shovel grunt closes one of the holes so the timebomb grunt can blow up the last two lumps. Step on the green hold switch until the ball in the castle's area is released. All gruntz proceed to the next checkpoint.
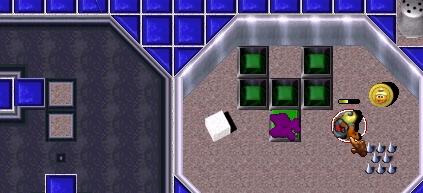
The timebomb grunt blows up the two lumps at the left and finds another coin. Walk back and step on the blue hold switch. The shovel grunt walks to the island on the left and gets the goober straw.
Follow the path towards the goober straw and back again.
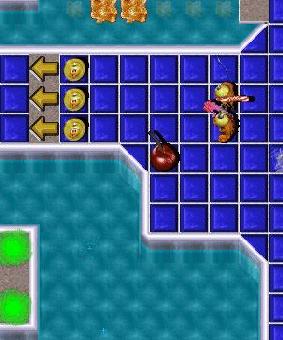
To move the shield grunt around use the keyboard " T " for rapid targeting. The two sponge gruntz must shoot immediately one after another. It's all a matter of proper timing!
First shoot the shield grunt to spot 1 and 2
Reposition your gruntz for spot 3 and 4
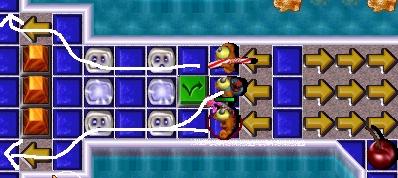
After the shield grunt has passed the last ball you have to zigzag him to the ? switch
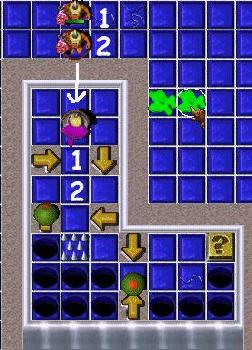
Before you shoot the shield grunt onto the ? switch, position the three other gruntz in front of the nine arrows. Get the coins, all three step on the arrows and pass the outlets. First get the red warp and then the last coin.

To get access to the red warp you first have to press the secret ? switch. The straw grunt goes up and waits in front of the arrows. The timebomb grunt puts an explosive near the enemy sword grunt so the latter will be killed. The sponge grunt now proceeds to the green toggle switch and waits there. Now the straw grunt steps on the arrows. As he passes the sponge grunt shoots him to the next arrows. This triggers the red warp where you'll get some coins. When you return from the red warp you can get the warp letter.
To get access to the last coin you first have to press the secret ? switch and have entered the red warp. Otherwise it isn't possible to get a perfect game. First position the sponge gruntz and the timebomb gruntz.
Now with the timebomb gruntz walk towards the arrow opposite the blue warp. Avoid the balls by stepping on the arrow. When the balls have passed and are moving to the left position the sponge gruntz opposite the blue warp as well and quickly shoot at the arrow. Just before the arrow is hit step on it with your timebomb gruntz so you enter the blue warp. The sponge grunt is sacrificed.
Now you're back at the start of the level. Step on the upper arrow, ignore the lumps. Blow up the lump in the upper right corner to get the last coin.